Practice Management on Embodia - Part 1: Charting - Sending a chart entry via fax
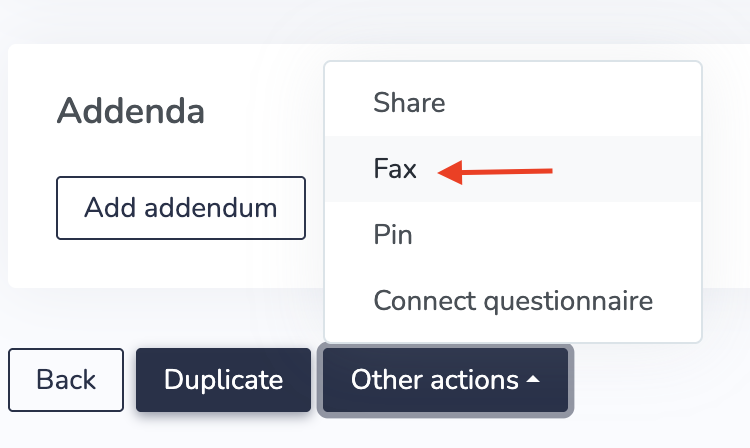
Once you've enabled faxing on your account, you will be able to fax a signed chart entry. From the chart entry page, scroll to the bottom, and click on Other actions > Fax.
Under the Sent tab, there will be a list of all the faxes that were sent for this chart entry. To send a new fax, click on Send a new fax.
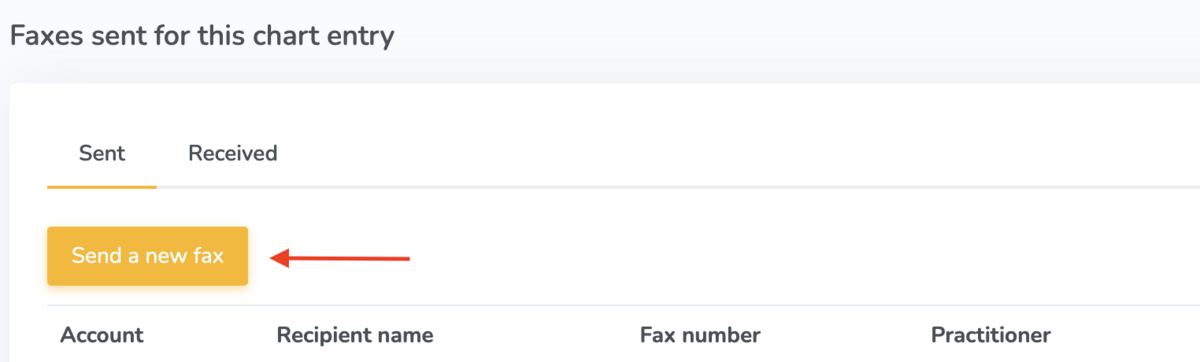
In the popup form, first select the WestFax account from which you'd like to send the fax, and then click Next. In the next page, search or enter the recipient's details (name and fax number). If you've elected to use cover pages on WestFax, you can also optionally select a cover page and provide the additional fields that will get populated on the cover page (the Recipient's company, subject, and message).
Click on Send fax to send the chart entry via fax. Sending the fax will take a few minutes to complete. You can view its status under the "Status" column in the table.
Adding received faxes
To add a received fax to a patient chart, click on the Received tab.
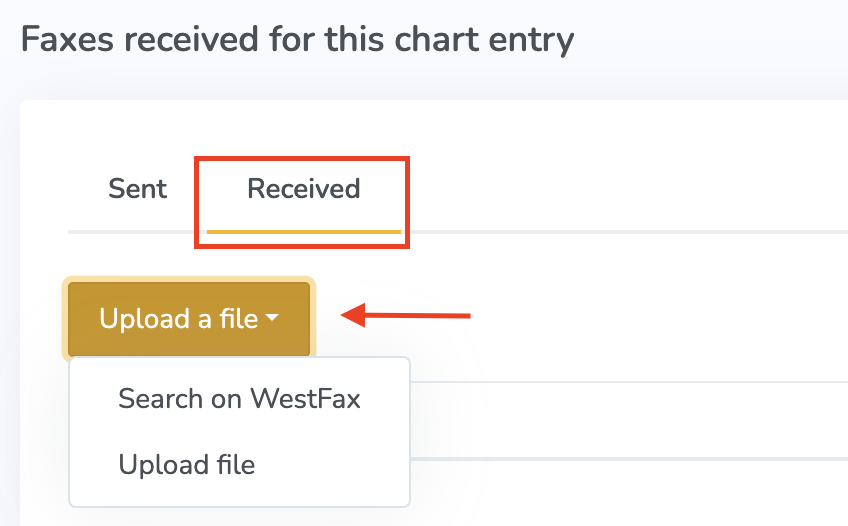
You can upload a received fax in 2 ways:
- If the fax was received in the last week, you can search for it. Click on Search on WestFax. In the pop-up form, select the WestFax account, enter the date the fax was received and then click on Search. This will list all the received faxes on the selected date. To add the fax to the chart entry, click on Upload.

- If you've manually downloaded the PDF from WestFax, click Upload file. In the pop-up form, add a description and select the file.